 Star
Star Documentation
Connect the WhatsApp Business (Meta) Cloud API — create a permanent System User token, grab your phone number ID, and point the webhook at Ganju.
WhatsApp runs on Meta’s WhatsApp Business Cloud API. Setup has a few more steps than the other channels because it happens in the Meta dashboard, but it’s a one-time job. You’ll create a Meta app, generate a permanent access token, copy your Phone number ID, then paste Ganju’s Callback URL back into Meta.
1. Create a Meta app with WhatsApp
- In the Meta for Developers dashboard, create an app (type Business) and add the WhatsApp product.
- Under WhatsApp → API Setup, note your Phone number ID (a numeric string — not the phone number itself) and your WhatsApp Business Account ID.
2. Generate a permanent access token
The temporary token on the API Setup page expires in 24 hours — create a permanent one instead:
- Open Business Settings → System users and add a System user.
- Assign your app to it and generate a token with the
whatsapp_business_messaging(andwhatsapp_business_management) permission. - Set it to never expire and copy it. This is your Access token.
3. Connect it in Ganju
In Channels → Add channel, pick WhatsApp, choose a language model, and fill in the fields:
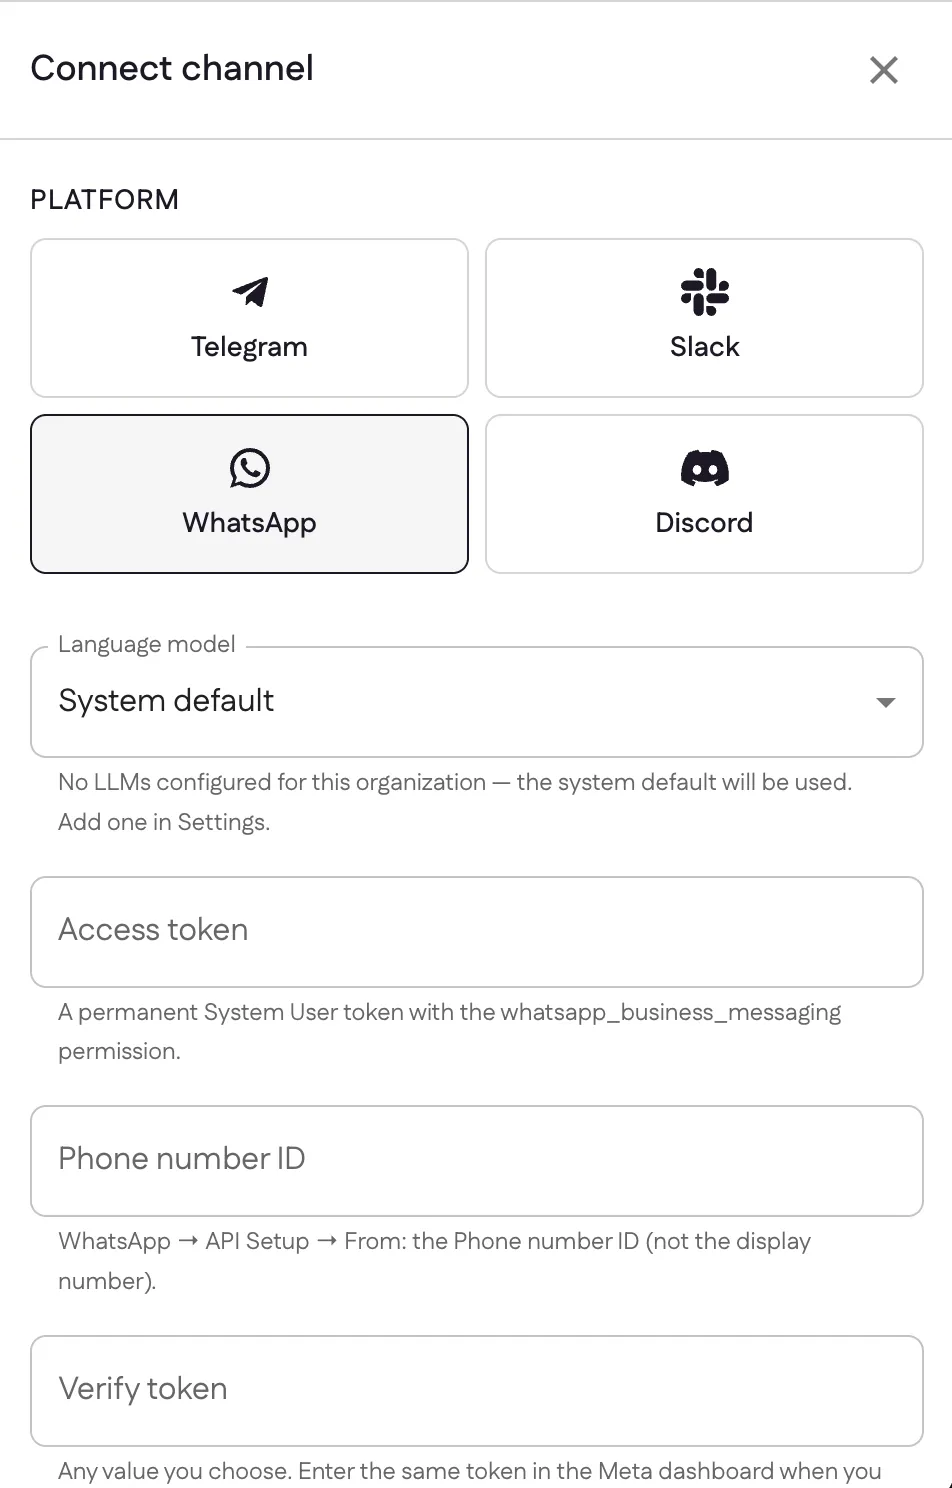
- Access token — the permanent System User token from step 2.
- Phone number ID — from WhatsApp → API Setup (the ID, not the display number).
- Verify token — any value you choose; you’ll enter the same string in Meta.
- App secret — from App → Settings → Basic, used to verify incoming webhooks.
Select Connect. Ganju then shows you a Callback URL.
4. Point the Meta webhook at Ganju
- In the Meta dashboard, go to WhatsApp → Configuration → Webhooks.
- Paste Ganju’s Callback URL and the Verify token you chose above, and verify.
- Subscribe the webhook to the
messagesfield.
Once verified, messages sent to your WhatsApp number reach your assistant.
Sources: WhatsApp Cloud API — Get Started (Meta), Creating a permanent WhatsApp access token
Last updated